2D Rendering - 9 - Viewports, Viewports Everywhere
 Download the source code for this post
Wotcha. This post wraps up what I think are the essentials that you should know before writing a libGDX 2D game. Granted, you probably need to know a bit more than you do with XNA, but once you understand it all, you have a lot of power at your fingertips.
Viewports
In this post, I am going to cover Viewports. A Viewport is simply a rectangular area somewhere on a device’s screen, where we want to render to. Once we have something to draw to the screen, OpenGL deals with translating our Normalised Device Coordinates (NDC) into screen coordinates, prior to rendering to the Viewport.
Actually, we’ve already been working with viewports - the default viewport - which is the same size as our game window. The thing is, it doesn’t need to take up the whole window, it can be smaller, and you can have many. Each viewport can have its own camera(s), each projecting a different view of the game. One of the most common uses of viewports, is to provide split-screen views for multliplayer games.
The source code for this tutorial demonstrates four viewports, each with their own camera, rendering the same world (a texture) in different ways. One viewport is zooming, one is rotating, one is translating, and, finally, one is shaking. You can see the program in action in the video below:
A Simpler Example
Before we discuss the code, first I’d like you to make a small modification to the code from my previous tutorial. Add the highlighted lines to your render() method, in the same position as shown below.
@Override
public void render () {
	float delta = Gdx.graphics.getDeltaTime();
	handleKeys(delta);
	shakeItBaby(delta);
	camera.update();

	Gdx.gl.glClearColor(colCornflowerBlue.r, colCornflowerBlue.g, colCornflowerBlue.b, colCornflowerBlue.a);
	Gdx.gl.glClear(GL20.GL_COLOR_BUFFER_BIT);


  	// BEGIN NEW CODE TO INSERT
  	// Bottom left
  	int viewportWidth = Gdx.graphics.getWidth() / 2;
  	int viewportHeight = Gdx.graphics.getHeight() / 2;
  	Gdx.gl.glViewport(0, 0, viewportWidth, viewportHeight);
  	// END NEW CODE TO INSERT

  	Gdx.gl20.glActiveTexture(GL20.GL_TEXTURE0);
	texture.setFilter(TextureFilter.Linear, TextureFilter.Linear);
	texture.bind();

	shader.begin();
	shader.setUniformi("u_texture", 0);
	shader.setUniformMatrix("u_projTrans", camera.combined);
	mesh.render(shader, GL20.GL_TRIANGLE_STRIP);
	shader.end();

	showMessage();
}
Now run the application and you will see the following.
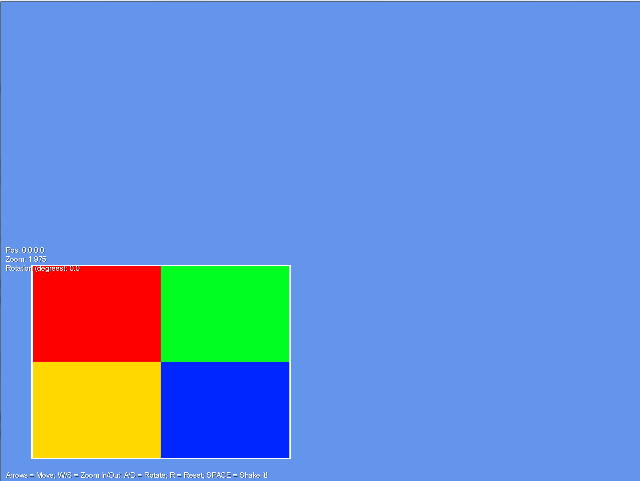
Can you see what has happened with this simple change? We have created a viewport, a quarter of the size of our screen, positioned it at the bottom left-hand corner and then rendered into it using exactly the same camera settings as we did when rendering into the whole screen.
The important points to note are:
- The camera settings are the same
- Our new viewport has the same aspect ratio as the whole screen.
Because of this, the rendering is exactly proportional to when we rendered to the full window. Ain’t life grand?
Okay, we’re ready to discuss the source code for this tutorial.
Custom Camera Class
In this application, as I mentioned before, we are going to need four cameras. For this reason, I’ve decided to create a new Camera class, so that each camera can manage its own state and also deal with the actual rotation, translation and scaling operations.
Here’s a snipped of that class.
public class JKOrthographicCamera extends OrthographicCamera {

	// Zoom members
	private float elapsedZoom;
	private float maxZoomIn;
	private float maxZomOut;
	private float zoomSpeedSeconds;

	// Rotation members
	private float currentRotation;
	private float rotateSpeedSeconds;

	// Translation members
	private float worldWidth;
	private float worldheight;
	private float translateSpeedSeconds;

	// Shake members
	private float shakeTime;
	private Vector3 storedPosition;
	private float storedRotation;
	private float maxShakeX;
	private float maxShakeY;
	private float maxShakeRotation;
	private float maxShakeTime;

        ...

        public void rotateLeft(float delta)...
        public void rotateRight(float delta)
        public float panLeft(float delta)...
        public float panRight(float delta)...
        public float panUp(float delta)...
        public float panDown(float delta)...
        public void zoomIn(float delta)...
        public void zoomOut(float delta)...
        public void shakeItBaby(float delta)...
So, as you can see, all familiar stuff from my previous tutorial, but instead of it all sitting in the main class, I’ve introduced this new class to encapsulate it all. A much neater approach.
Note that I have extended OrthographicCamera, so JKOrthographicCamera is-a OrthographicCamera and therefore inherits all of its functionality, but also adds more of its own. i.e it specialises the OrthographicCamera class.
Initialising the Cameras
In the Viewports class, we hold an array of cameras - one for each viewport. When we initialise them, we allocate one for each array position and give them a default zoom level. Finally, we initialise each camera for whatever its role is (i.e. scaling, translating, rotating or shaking)
private JKOrthographicCamera[] cameras = new JKOrthographicCamera[NUM_VIEWPORTS];

private void initCameras(int width, int height){

	for(int i = 0; i < NUM_VIEWPORTS; i++){
		cameras[i] = new JKOrthographicCamera(width, height);
		cameras[i].zoom = (MAX_ZOOM_OUT - MAX_ZOOM_IN) / 2;
		cameras[i].initZoom(MAX_ZOOM_IN, MAX_ZOOM_OUT, SPEED_ZOOM_SECONDS, (MAX_ZOOM_OUT - MAX_ZOOM_IN) / 2);
	}

	// zoom in a bit for panning
	cameras[2].initZoom(MAX_ZOOM_IN, MAX_ZOOM_OUT, SPEED_ZOOM_SECONDS, (MAX_ZOOM_OUT - MAX_ZOOM_IN) / 4);

	// zoom in a bit for shaking
	cameras[3].initZoom(MAX_ZOOM_IN, MAX_ZOOM_OUT, SPEED_ZOOM_SECONDS, (MAX_ZOOM_OUT - MAX_ZOOM_IN) / 4);

	//init camera for zooming
	cameras[0].initZoom(MAX_ZOOM_IN, MAX_ZOOM_OUT, SPEED_ZOOM_SECONDS, 1f);

	// init camera for rotation
	cameras[1].initRotate(SPEED_ROTATE_SECONDS);

	// init camera for translation
	cameras[2].initTranslate(WORLD_WIDTH, WORLD_HEIGHT, SPEED_TRANSLATE_SECONDS);

	// init camera for shaking
	cameras[3].initShake(MAX_SHAKE_X, MAX_SHAKE_Y, MAX_SHAKE_ROTATION, MAX_SHAKE_TIME);
	}
Rendering
In our resize() method, we calculate the width and height of each viewport and then initialise the cameras, as discussed above.
@Override
public void resize(int width, int height) {
	super.resize(width, height);
	viewportWidth = width / 2;
	viewportHeight = height / 2;
	initCameras(width, height);
}
For this application, I also decided to add a separate update() method, so that we can separate out updating game state from the rendering code. Users of XNA will be familiar with this concept.
private void updateCameras(){
	for(JKOrthographicCamera camera: cameras){
		camera.update();
	}
}

private void update(){
	float delta = Gdx.graphics.getDeltaTime();
	updateCameras();
	updateCameraZoom(delta, cameras[0]);
	updateCameraRotate(delta, cameras[1]);
	updateCameraTranslate(delta, cameras[2]);
	updateCameraShake(delta, cameras[3]);
}
renderCamera() just holds common code that we need to execute when rendering each viewport.
private void renderCamera(JKOrthographicCamera camera){
	Gdx.gl20.glActiveTexture(GL20.GL_TEXTURE0);
	texture.setFilter(TextureFilter.Linear, TextureFilter.Linear);
	texture.bind();

	shader.begin();
	shader.setUniformi("u_texture", 0);
	shader.setUniformMatrix("u_projTrans", camera.combined);
	mesh.render(shader, GL20.GL_TRIANGLE_STRIP);
	shader.end();
	showMessage(camera);
}
In the render() method, we call update(), clear the screen, create each viewport and render them in turn.
@Override
public void render () {

	update();

	Gdx.gl.glClearColor(colCornflowerBlue.r, colCornflowerBlue.g, colCornflowerBlue.b, colCornflowerBlue.a);
	Gdx.gl.glClear(GL20.GL_COLOR_BUFFER_BIT);

	// Bottom left
	Gdx.gl.glViewport(0, 0, viewportWidth, viewportHeight);
	renderCamera(cameras[0]);

	// Top left
	Gdx.gl.glViewport(0, viewportHeight, viewportWidth, viewportHeight);
	renderCamera(cameras[1]);

	// Top right
	Gdx.gl.glViewport(viewportWidth,  viewportHeight, viewportWidth, viewportHeight);
	renderCamera(cameras[2]);

	// Bottom Right
	Gdx.gl.glViewport(viewportWidth, 0, viewportWidth, viewportHeight);
	renderCamera(cameras[3]);
}
That’s about it really. Apart from no longer accepting keyboard input to apply the transformations, we simply draw the same texture multiple times using code that I have refactored from my previous tutorial.
Coming up next
Lots of Ale hopefully… but apart from that, we’ll start digging into Sprites
JK